As a content creator, I’ve always known that offering a valuable lead magnet is one of the best ways to grow an email list.
However, I also realized early on that a lead magnet is only as effective as its design. Even the most valuable guide or checklist can fail to capture attention if it looks unprofessional or boring.
That’s when I started using Design Pickle, and it completely transformed how I create lead magnet designs that not only attract readers but also encourage them to subscribe.
In this article, I’ll share exactly how I use Design Pickle to create high-quality, visually appealing lead magnets that convert, including my process, tips, and the results I’ve seen.
Why Lead Magnet Design Matters

Before I explain how I use Design Pickle, it’s worth talking about why lead magnet design is so important.
A lead magnet is typically the first piece of content a potential subscriber interacts with. It might be a free eBook, checklist, worksheet, or resource guide.
If the design is unappealing or difficult to read, the subscriber’s first impression suffers.
Here’s what good design achieves for a lead magnet:
- Grabs Attention – People decide whether to engage with content in seconds. A visually attractive cover and layout increase the chances they’ll open your lead magnet.
- Improves Readability – Even if your content is valuable, a cluttered or confusing layout can make readers abandon it. Proper spacing, typography, and hierarchy make it easier for them to consume the content.
- Builds Credibility – Professionally presented content gives your audience confidence in your brand. If your lead magnet looks amateurish, readers may question the quality of your other offerings.
- Encourages Sharing – People are more likely to share attractive resources. This extends your reach and helps your audience grow.
Understanding these points made me realize that I needed a solution that would let me consistently create polished, professional designs without having to hire a full-time designer or spend hours learning complex software.
That’s where Design Pickle came in.
Why I Chose Design Pickle

I first heard about Design Pickle when researching unlimited graphic design services.
I was looking for a solution that could help me with more than just lead magnet design, something that could handle social media graphics, presentation visuals, email graphics, and more.
Here’s why I decided to give Design Pickle a try:
- Unlimited Requests – I could submit as many design requests as I wanted each month. For someone constantly creating lead magnets, this was a huge advantage.
- Flat-Rate Pricing – Instead of paying for each individual design, I paid one monthly fee and got all the designs I needed. This made budgeting predictable.
- Professional Designers – Each request is handled by a real designer who can take my ideas and turn them into high-quality visuals.
- Support for Revisions – If a design needed modification, I could request revisions without extra cost.
Once I started using it, I realized that Design Pickle wasn’t just a tool for creating pretty graphics, it was a resource that allowed me to focus on my content while someone else handled the visual execution.
My Lead Magnet Design Process Using Design Pickle

I’ve really honed how I create lead magnets using Design Pickle. I put a lot of work into this process, and it helps me get great results without a lot of hassle.
Here’s a look at the five steps I take:
Step 1: Plan the Lead Magnet
The first step is always planning.
Before I request any design, I define what my lead magnet will include and how it will be structured.
Some questions I ask myself:
- What type of lead magnet is this? eBook, checklist, template, resource guide, or worksheet?
- Who is my target audience, and what design style would appeal to them?
- What sections, images, or visual elements will I need?
By answering these questions, I ensure that my design request is complete, which helps the designer create exactly what I want.
Step 2: Create a Visual Brief
Once I know the structure and purpose of the lead magnet, I create a visual brief for Design Pickle.
This brief includes:
- The type of lead magnet and the number of pages.
- Branding guidelines such as fonts, colors, and logos.
- Examples of designs I like or styles I want to emulate.
- Any specific graphics, icons, or charts I want included.
Providing a detailed brief makes a huge difference in the final output.
Designers can take my vision and produce high-quality results without a lot of back-and-forth.
Step 3: Submit the Request
With the brief ready, I submit my request to Design Pickle.
The process is easy: I upload my files, describe what I need, and submit it. The system is user-friendly, so I don’t waste time figuring out complicated interfaces.
Step 4: Review and Feedback
After a day or two, I receive the first draft. I review the design carefully, looking at:
- Typography and font hierarchy
- Layout and spacing
- Color usage and branding consistency
- Visual appeal and readability
If something doesn’t match my vision, I request revisions.
I can usually get the final version after one or two rounds of feedback.
Step 5: Incorporate the Design
Once I approve the design, I integrate it into my lead magnet content.
This could be formatting the eBook in Canva or Google Docs, adding interactive elements, or preparing it as a PDF for download.
By this stage, the visual work is complete, and my content is ready for subscribers.
Examples of Lead Magnet Designs I’ve Created

I’ve used Design Pickle for multiple types of lead magnets. Here are a few examples:
- Checklists – Short, actionable checklists work well for list-building campaigns. Using Design Pickle, I can turn a simple checklist into a visually appealing one with icons, colors, and spacing that makes it easy to read.
- eBooks and Guides – Longer content pieces require consistent page layouts. Design Pickle helps me create professional covers, page headers, and infographics that maintain reader engagement.
- Workbooks and Templates – Interactive lead magnets like workbooks need structured layouts. Designers help me create areas for readers to fill in information while keeping the design engaging.
- Infographics and Cheat Sheets – Visual resources like cheat sheets need to convey information clearly. With Design Pickle, I can include icons, charts, and highlighted tips that improve comprehension and usability.
The final result for every lead magnet I create using Design Pickle is always cohesive and professional. This quality greatly improves how my audience perceives my brand.
Tips for Maximizing Lead Magnet Conversions
Design matters, but design alone doesn’t guarantee conversions.
Here are a few strategies I pair with Design Pickle designs to increase sign-ups:
- Keep It Focused: Lead magnets should address one specific problem. A checklist for content planning works better than a 50-page ebook covering everything about marketing.
- Use Actionable Language: Titles like “10-Step Social Media Planning Checklist” or “5-Day Productivity Guide” convey immediate value and make readers feel they can implement it quickly.
- Make It Easy to Access: Once someone opts in, I deliver the lead magnet instantly via email. Delays or complex download processes can reduce satisfaction and trust.
- Align Design With Brand Identity: Consistent colors, fonts, and visual elements reinforce trust. Even if a lead magnet is small, it should feel like it’s part of my overall brand.
- Test and Iterate: Sometimes, small changes in design or layout can impact conversion rates. I occasionally request alternate versions through Design Pickle to test what works best.
The Results I’ve Seen
Since I started using Design Pickle, I’ve seen real, measurable improvements in my lead magnet campaigns:
- Higher Download Rates – Readers are more likely to download a lead magnet that looks professional and visually appealing.
- Increased Email Subscriptions – Because the lead magnets look excellent, more readers trust the content and subscribe.
- Better Engagement – Subscribers spend more time interacting with my material when it has great visual presentation.
- Reduced Design Stress – I no longer spend hours trying to create layouts in software I’m not skilled at. I can focus on content creation while Design Pickle handles the visuals.
These results have reinforced the value of investing in professional design. Even for free content, presentation matters.
So, How Much Does Design Pickle Cost?

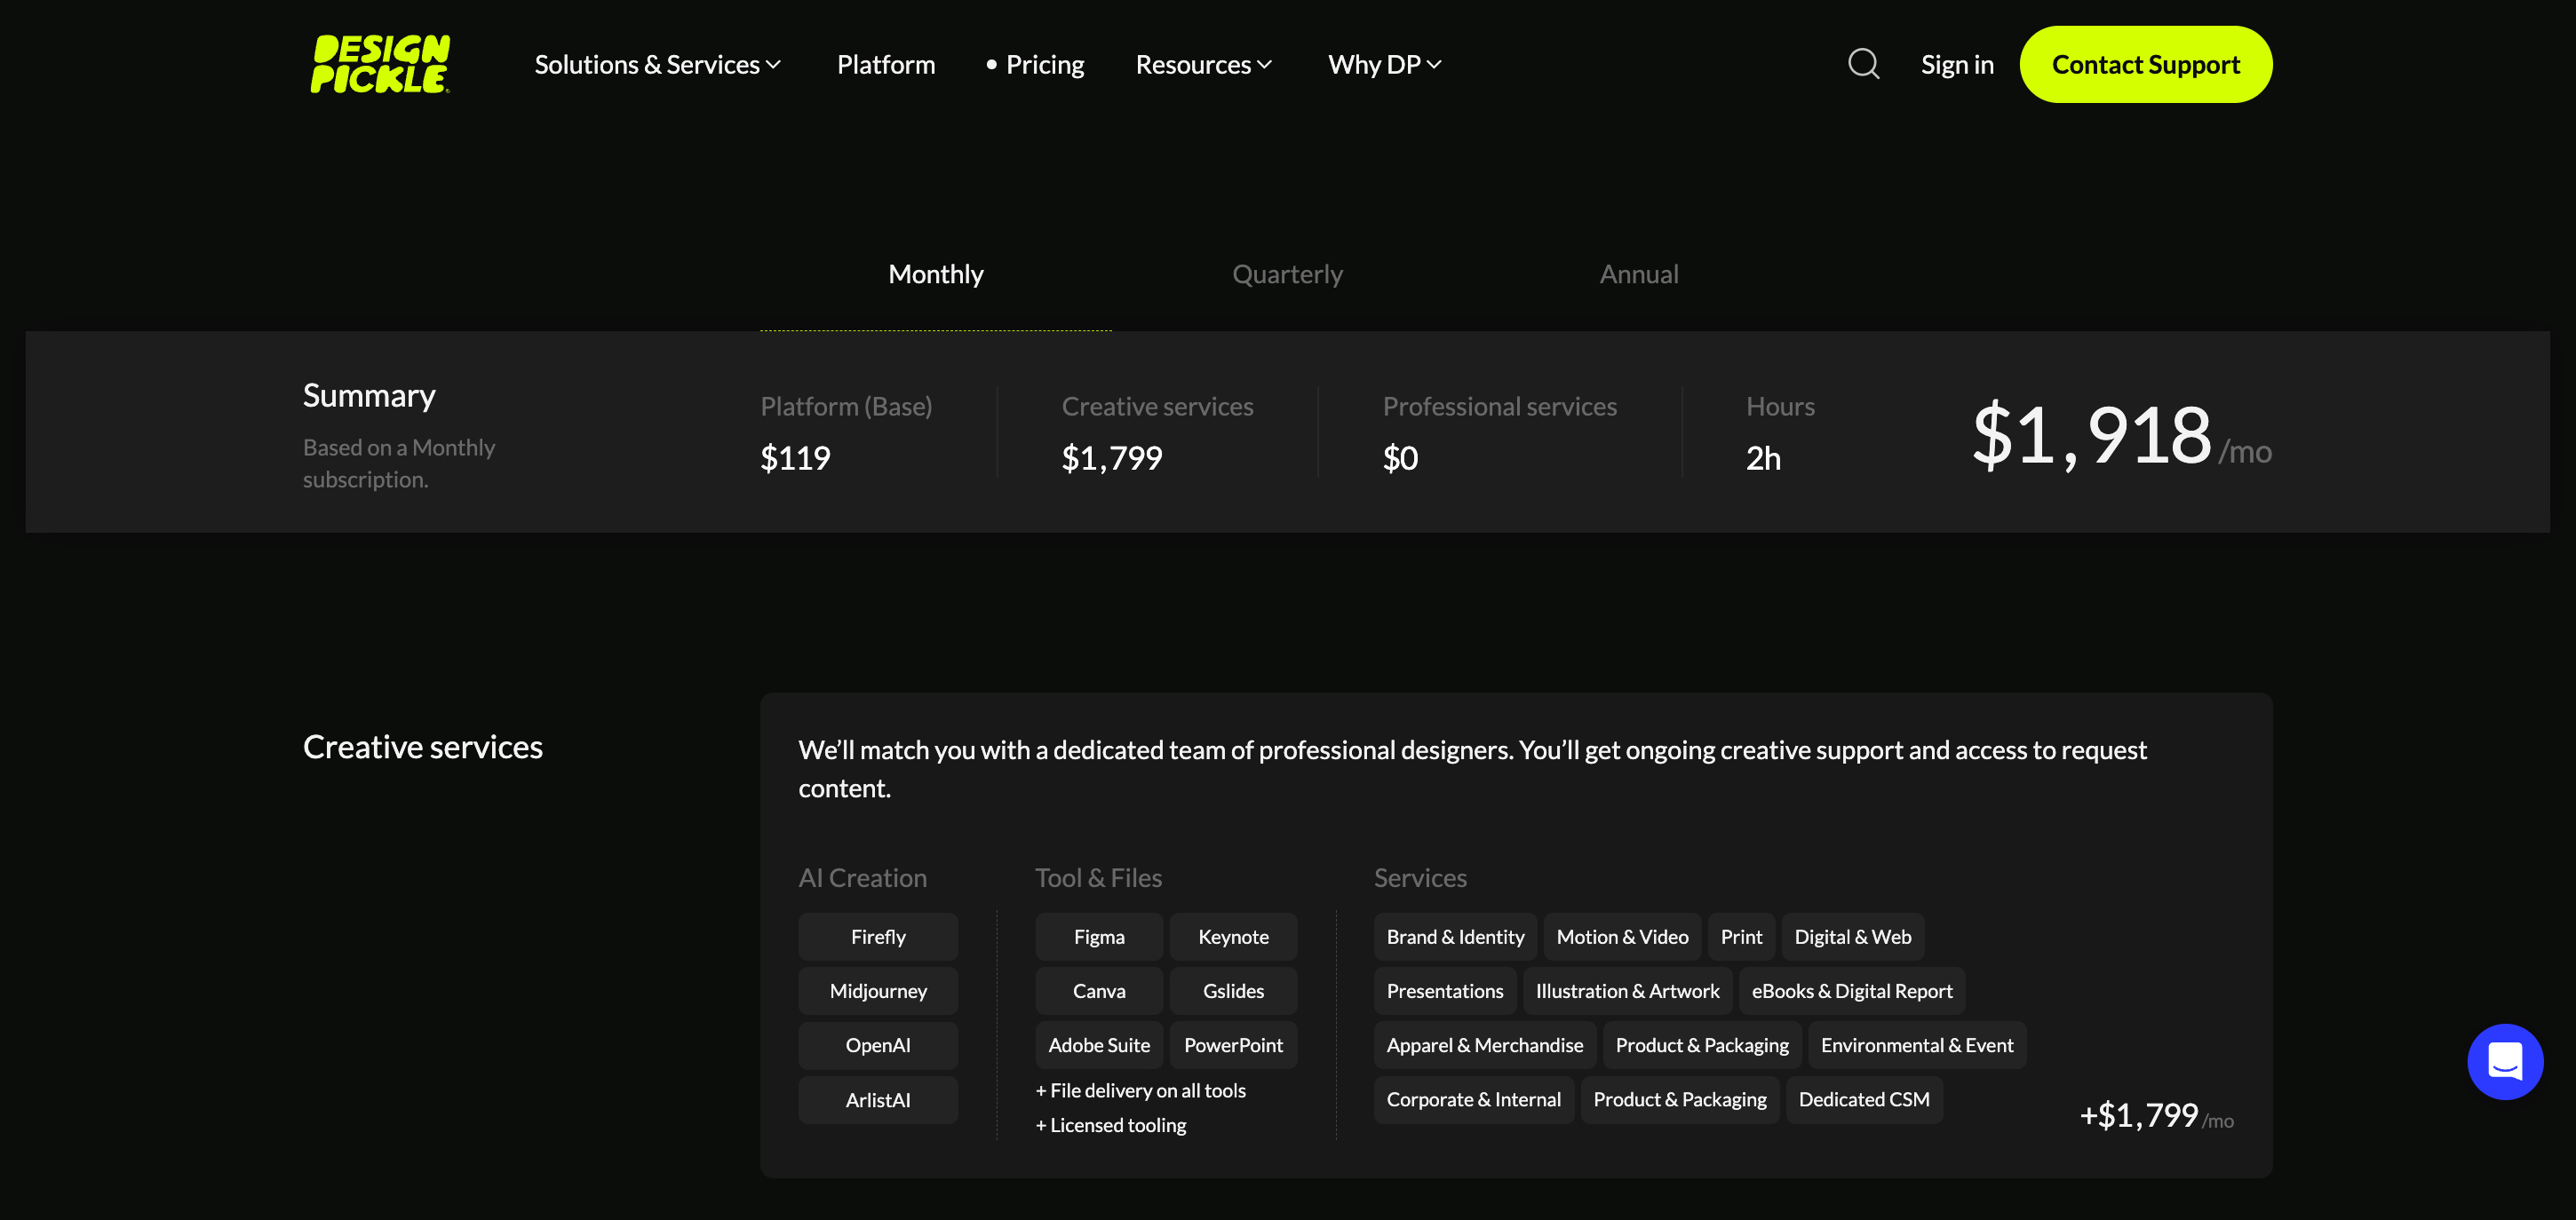
Design Pickle’s pricing works on two main parts — a base platform fee and the number of daily “Creative Hours” you choose.
Here’s how it breaks down:
Base Platform + 2 Creative Hours: This plan costs about $1,918 per month, or $1,279 per month if you choose an annual plan. It’s a good option for smaller teams that handle simple creative projects.
As you add more features, users, or daily creative hours, the monthly cost increases. For instance:
A Quarterly plan for the Base Platform + 2 Creative Hours costs around $1,600 per month.
A Pro Platform + 2 Creative Hours plan is about $2,098 per month and includes added perks like unlimited users, Stockpress integration, and white-label options.
Design Pickle has moved away from its old tier-based pricing model (such as “Graphics Pro” or “Premium”) and now bases its pricing on how many creative hours you reserve each day.
The more hours you reserve, the lower your cost per hour tends to be.
Visit Design Pickle pricing page for more details ->
My Takeaway on Lead Magnet Design
Creating lead magnets that attract subscribers doesn’t have to be stressful or time-consuming.
With Design Pickle, I can focus on producing valuable content while leaving the design to professionals who understand layout, color, and typography. The result is lead magnets that are not only attractive but also convert readers into loyal subscribers.
Using Design Pickle has allowed me to experiment with different formats, maintain brand consistency, and ultimately grow my email list faster than I could on my own.
If you’ve struggled with creating lead magnets that look professional, I highly recommend exploring Design Pickle.
Click right here to learn more about this platform ->
You might also like…
- Design Pickle vs Freelancers: Which One Is Better?
- The 7 Best Unlimited Graphic Design Services In 2025
- Canva vs. Design Pickle: Which Is Better for Small Businesses?
- Design Pickle vs Flocksy: Who Offers Better Quality and Faster Design?
- How I Use Design Pickle to Create Promo Banners and Email Designs That Sell
- How to Choose the Best Graphic Design Subscription Service for Your Business
- How I Use Design Pickle to Design Engaging Ad Creatives That Actually Convert
- How I Use Design Pickle to Save Hours on Pinterest Pin Design (Without Losing Quality)


