Affiliate Disclosure: This article contains affiliate links. If you choose to sign up for WordPress.com through these links, I may earn a small commission at no additional cost to you.
Ever tried to install a plugin on WordPress.com… and hit a wall?
Yeah, same. For the longest time, it felt like you needed to upgrade to some expensive plan just to unlock basic features. Honestly, it was frustrating.
But here’s the twist — that’s no longer true.
WordPress.com just rolled out a big update. Every paid plan now supports plugin installation, opening the door to 50,000+ tools you can use to customize your site, improve SEO, and build something that actually feels like a complete, professional website.
This is a big step forward. For the first time, you don’t need to upgrade to a higher-tier plan to access plugins or advanced themes. No matter which paid plan you’re on, you get full control over your site’s design and functionality right from the start.
So if you’ve been stuck or confused, don’t worry. I’ll walk you through exactly how to install plugins on a WordPress.com site step by step — no tech headaches.
Let’s go.
2026 Update – Plugins Now Available on All WordPress.com Paid Plans
For a long time, building a serious website on WordPress.com felt… limited.
You had ideas. You wanted better SEO, faster loading, and more control. But without plugins, you were stuck working with whatever the platform gave you.
That’s what made it frustrating.
Now, that’s changed.
With plugin access available on all paid plans, you can finally build your site the way you want. You’re not boxed in anymore.
Want to rank higher on Google? You can install an SEO plugin.
Want your site to load faster? There’s a plugin for that.
Want better security or backups? You’ve got options.
And the best part — you don’t need to pay extra just to unlock these tools.
This update gives you real control. The kind that turns a basic site into something that actually grows, performs, and works for you.
Try WordPress.com – now with plugins on all paid plans ->
Before You Start – What You Need
Before we jump into installing plugins, let’s make sure you’ve got the basics sorted. This will save you from that “why isn’t this working?” moment.
First, you need to be on any paid WordPress.com plan.
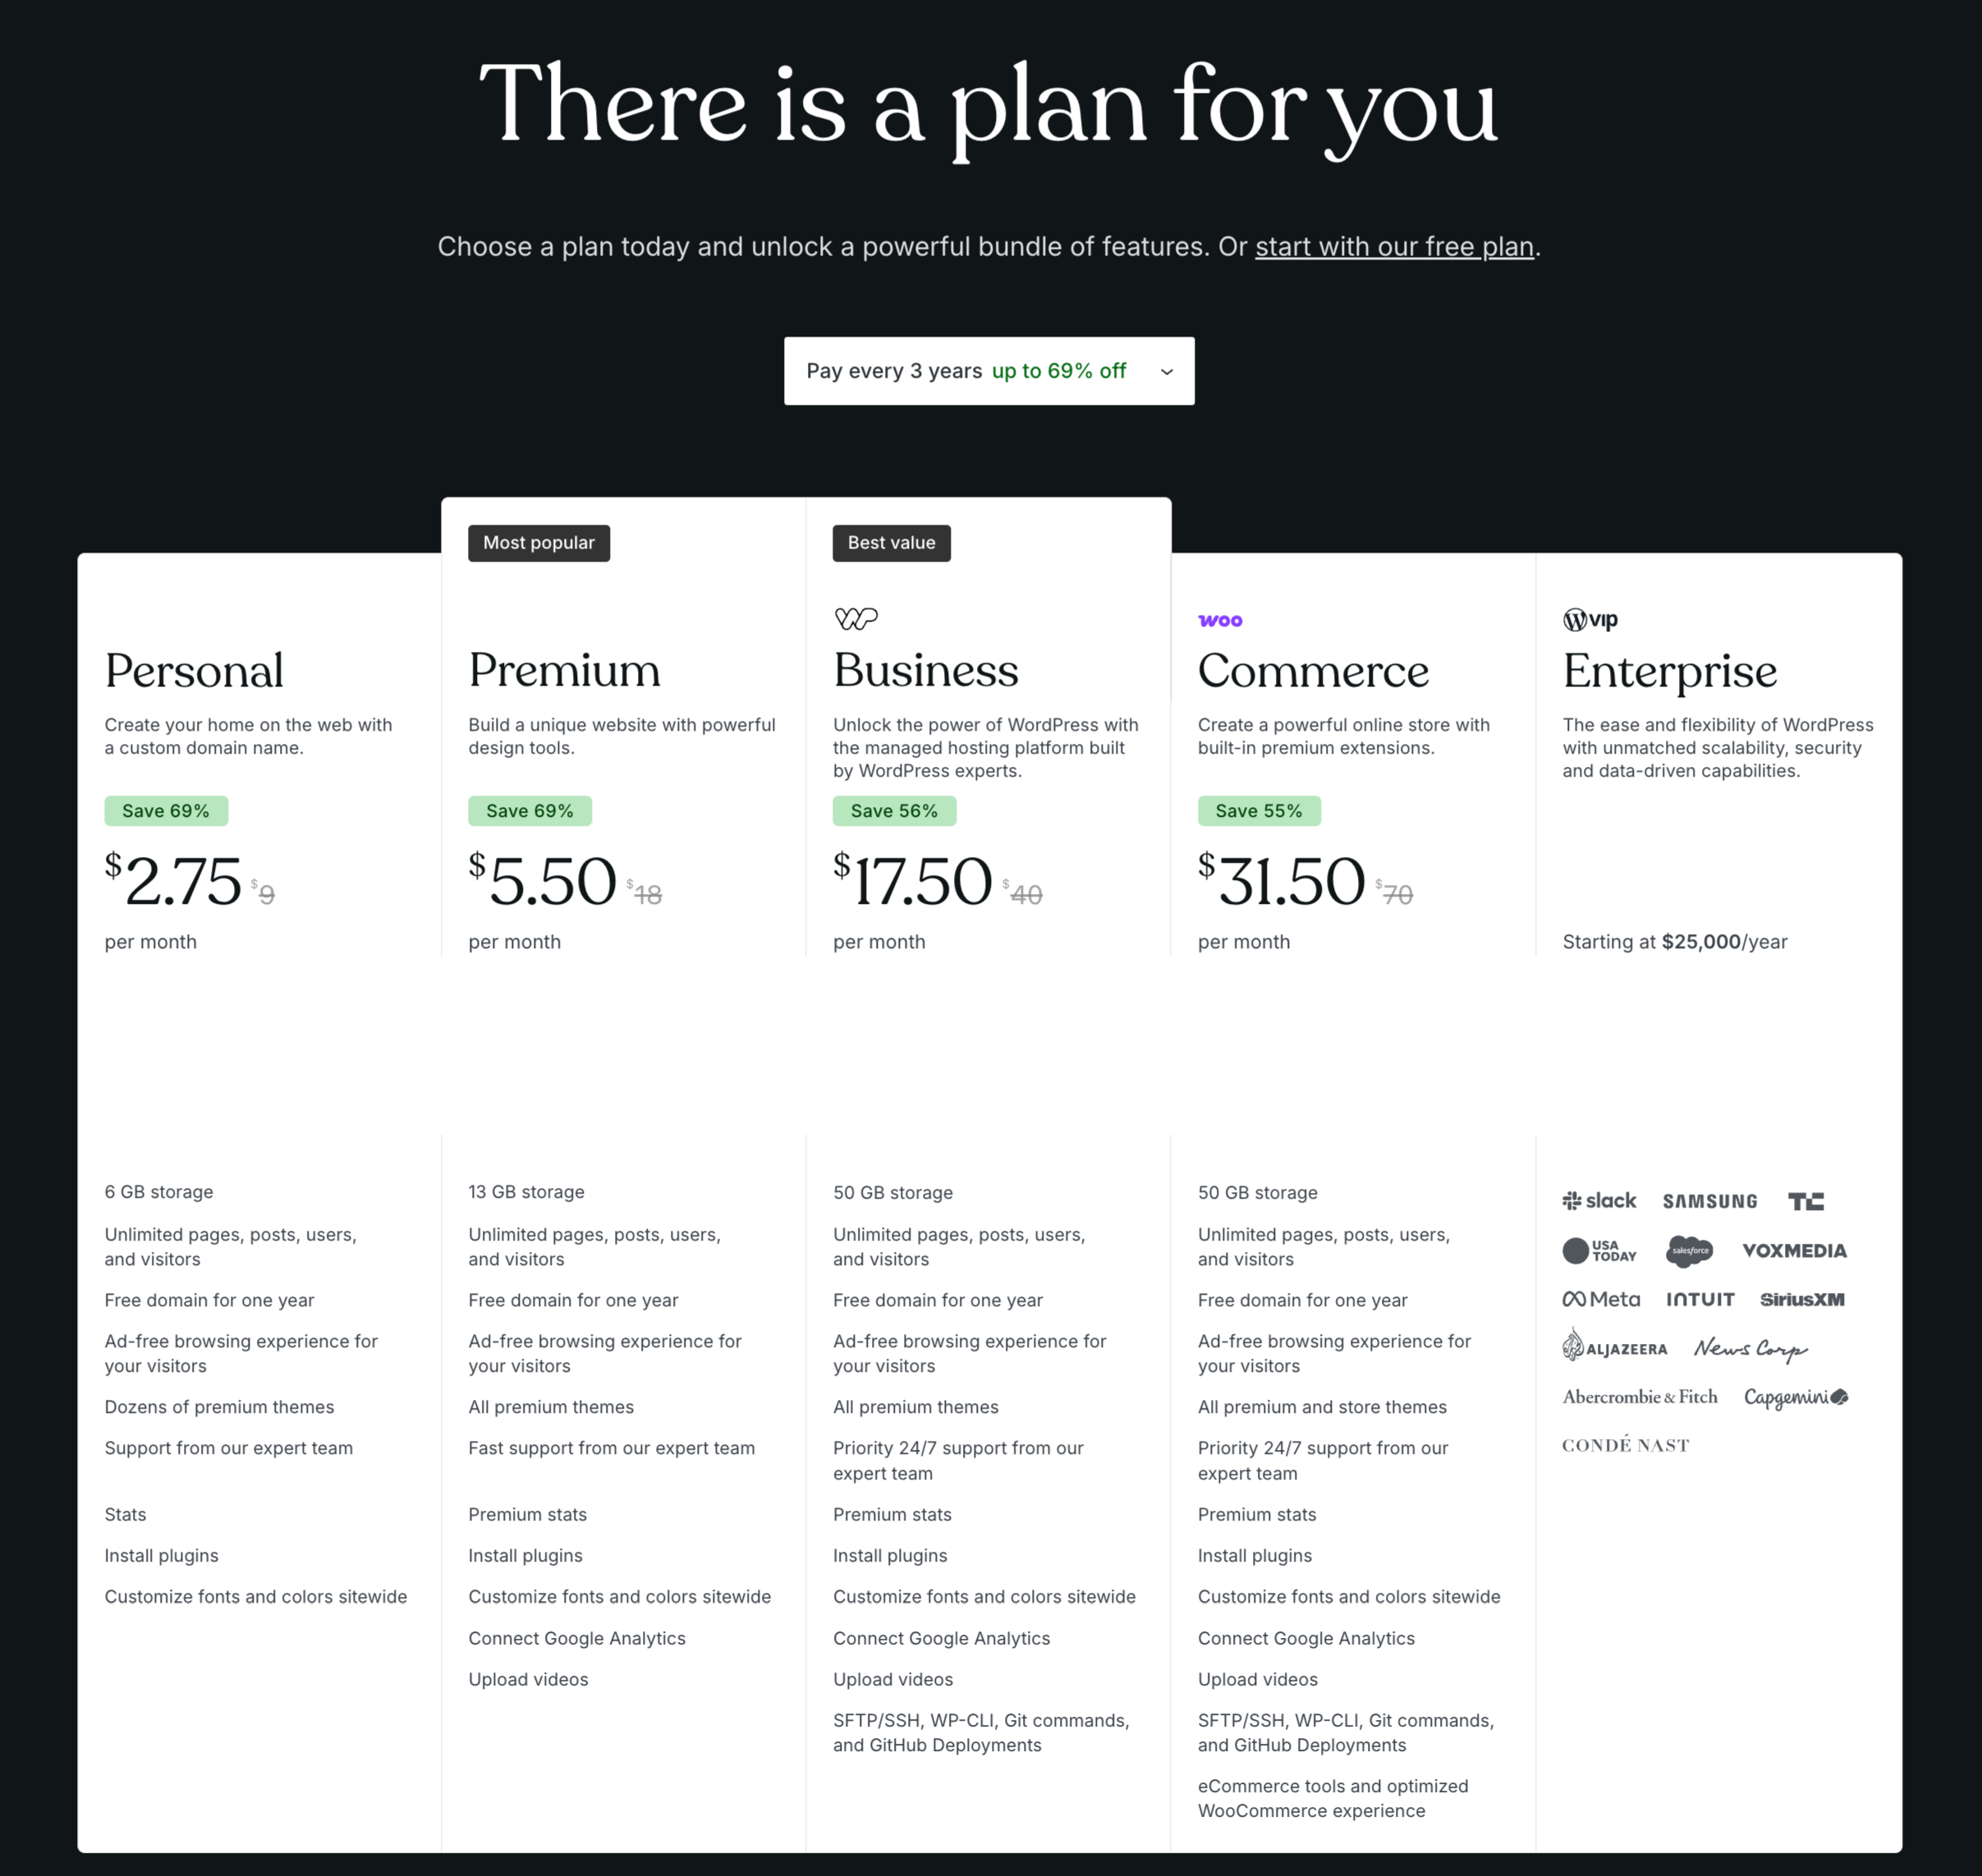
If you’re on the free plan, you can’t install the plugin at all. It’s not hidden — it just doesn’t exist there. So if you don’t see “Add New Plugins” in your dashboard, this is usually the reason.
Next, make sure you’re logged into your dashboard.
Sounds obvious, but a lot of beginners end up on the front end of their site and start clicking around there. You want to be inside your WordPress.com dashboard, where all the controls live.
And one quick thing — what even is a plugin?
Think of plugins like apps for your website. Just like you install apps on your phone to add new features, plugins do the same for your site.
Want better SEO? There’s a plugin.
Want a contact form? Plugin.
Want backups, security, speed improvements? Plugins handle all of it.
Once you’ve got a paid plan and access to your dashboard, you’re ready.
Built-in WordPress.com Features
You don’t need to start from scratch. Every WordPress.com plan comes with these tools right out of the box:
- Jetpack: Handles your security, performance, and site traffic data.
- Akismet: Blocks 99.99% of spam comments and junk.
- SEO Tools: Helps search engines find your content.
- Global CDN: Loads your pages fast for visitors everywhere.
- SSL Certificates: Keep your site secure with automatic HTTPS.
- Contact Forms: Built-in for Business plans and above.
Before you look for extra software, check this list. Avoid installing plugins that do things your site can already do on its own.
Step-by-Step – How to Install Plugins on WordPress.com
Alright, this is where it all clicks.
Once you know where to look, installing a plugin is actually simple. The problem is, most people just don’t know where to start.
I remember the first time I tried this after the update — I expected it to be complicated. But once I found the right option, it literally took a couple of minutes.
Let’s walk through it.
Step 1: Go to Your Dashboard

Log in to your WordPress.com account.
Once you’re in, head to your dashboard. This is your control center — where you manage everything on your site.
If you’re not sure you’re in the right place, look for the sidebar menu on the left.
Step 2: Click on “Plugins”

In the left-hand menu, find and click on “Plugins.”
Now you’re inside the plugin library — this is where you can browse and search through thousands of plugins.
Step 3: Search for a Plugin

Use the search bar to find the plugin you want.
For example:
- Type “SEO” if you want to improve your rankings
- Type “security” if you want to protect your site
- Type “cache” or “speed” if your site feels slow
You’ll see a list of plugins pop up with ratings and install options.
The first plugin I installed was an SEO plugin, just to see if everything worked — and it did, instantly.
Step 4: Click “Install” -> Then “Activate”

Once you find a plugin you like:
Click “Install”.
Then click “Activate”
That’s it.
Your plugin is now live on your site and ready to use.
Some plugins will add new settings in your dashboard, so you can customize how they work. When I activated my first plugin, it immediately showed up in the dashboard with new settings — no issues, no extra steps.
And that’s the whole process.
No coding. No complicated setup. Just a few clicks.
How to Upload a Plugin (Manual Method)
So far, we’ve installed plugins directly from the WordPress library.
But what if you bought a premium plugin… or downloaded one from a website?
That’s where this method comes in.
I remember the first time I tried this, I thought it would be technical. Uploading files, dealing with errors… all that.
It wasn’t.
It’s actually just as simple — you’re just uploading a file instead of searching for it.
When Would You Use This?
You’ll use this method when:
- You buy a premium plugin (like from a developer’s website)
- You download a plugin as a .zip file
- The plugin isn’t available in the WordPress search library
Step 1: Download the Plugin File
After purchasing or downloading the plugin, you’ll usually get a .zip file.
Don’t unzip it.
Just keep it as it is — WordPress needs the zipped version.
Step 2: Go to the “Plugins” Section
Head back to your WordPress.com dashboard.
Click “Plugins.”
Same place as before.
Step 3: Click “Upload”

At the top of the page, you’ll see an “Upload” button.
Click it.
This is the part most people miss the first time.
Step 4: Upload the ZIP File

Click “Choose File”, select your plugin’s .zip file, and upload it.
Then click “Install Now.”
It takes a few seconds.
Step 5: Click “Activate”
Once it’s installed, click “Activate.”
And just like that, your plugin is live.
The first time I did this, I expected something to go wrong — but it worked right away. No errors, no extra setup.
So if you’ve been avoiding this method, don’t. It’s just as easy as the regular install.
Best Plugins to Install First (Start With These)
Now that you can install plugins, the real question is:
What should you install first?
Here’s the mistake most people make — they install too many plugins right away.
That slows your site down and creates confusion.
Instead, start with a few that solve the biggest problems.
1. Get More Traffic (SEO Plugin)
If you want people to find your site on Google, this is where you start.
An SEO plugin helps you:
- Know what to fix on each page
- Write better titles and descriptions
- Improve your chances of ranking
2. Keep Your Site Safe (Security Plugin)
Even small sites get targeted.
A security plugin protects your site in the background so you don’t wake up to problems later.
Set it once, and it does the job quietly.
3. Don’t Lose Your Work (Backup Plugin)
This one is simple.
If something breaks, a backup saves you.
Without it, you’re rebuilding everything from scratch.
4. Speed Up Your Site (Performance Plugin)
Slow sites lose visitors.
A performance plugin helps your pages load faster — which keeps people on your site and helps with rankings.
5. Let People Contact You (Form Plugin)
If someone wants to reach you, make it easy.
A form plugin lets visitors message you without friction — which can turn into opportunities.
Start with these 4–5.
That’s enough to make your site:
- Easier to find
- Safer
- Faster
- More useful
You can always add more later.
Common Problems (and Quick Fixes)
Even though installing plugins is simple, a few things can trip you up.
Here are the most common issues — and how to fix them quickly.
1. “I don’t see the Plugins option”
This is the most common one.
If “Plugins” isn’t showing in your dashboard, you’re likely still on the free plan.
Solution:
Upgrade to a paid plan, then refresh your dashboard. The option should appear right away.
2. Plugin won’t install
Sometimes you click install… and nothing happens, or it fails.
This is usually because:
- The plugin isn’t compatible
- There’s a temporary glitch
- Or the file you uploaded isn’t correct
Solution: Try installing a different plugin to test. If you’re uploading manually, make sure it’s a proper .zip file.
3. Plugin installed, but nothing changed
This confuses a lot of people.
You install a plugin… and expect something to happen instantly.
But many plugins need to be configured first.
Solution: After activation, look for new settings in your dashboard (usually in the sidebar or under “Settings”).
4. Your site looks broken after installing a plugin
It’s rare, but it happens.
Some plugins don’t play well with others or with your theme.
Solution: Go back to your Plugins page and deactivate the plugin. Your site should return to normal.
This is exactly why having a backup plugin helps.
5. Dashboard feels overwhelming
Once you install a few plugins, your dashboard can start to feel crowded.
Solution: Stick to essential plugins only. Don’t install anything “just to try” unless you actually need it.
Most of these issues are easy to fix once you know what’s going on.
So if something doesn’t work right away, don’t panic — it’s usually a small thing.
WordPress.com vs WordPress.org (What’s the Difference Now?)
This is where a lot of people get confused.
You’ve probably heard about WordPress.com and WordPress.org and wondered… what’s the actual difference?
Here’s the simple version.
WordPress.com (what you’re using)
Everything is managed for you.
Hosting, security, updates — it’s all handled in the background. You just log in and build your site.
Before this update, it felt limited because you couldn’t install plugins unless you paid more.
Now? That limitation is mostly gone.
You can install plugins on any paid plan, which gives you a lot more control without needing to manage everything yourself.
WordPress.org (self-hosted WordPress)
This gives you full control from the start.
You can install any plugin, use any theme, and customize everything — but you’re also responsible for:
- Hosting
- Security
- Backups
- Maintenance
It’s more flexible, but also more hands-on.
So what changed?
This update brings WordPress.com much closer to WordPress.org.
You still get the simplicity of WordPress.com, but now with the flexibility of plugins, which used to be the biggest advantage of WordPress.org.
Which one should you choose?
If you want something simple and managed -> WordPress.com is a great choice now.
If you want full control and don’t mind handling the technical side -> WordPress.org still gives you more freedom.
For most beginners, this update makes WordPress.com a much better starting point than it used to be.
Final Thoughts
For a long time, WordPress.com felt limited.
You could build a site, sure — but without plugins, it never felt like you had full control.
That’s changed now.
With plugin access available on all paid plans, you can finally build your site the way you want. Add the tools you need, improve your site’s performance, and actually grow it without hitting unnecessary limits.
And as you’ve seen, installing plugins isn’t complicated.
It’s just a few clicks — and you’re done.
So here’s the move:
Go into your dashboard, install your first plugin, and start improving your site today.
Don’t overthink it. Just start.
Frequently Asked Questions
Can I install plugins on the free WordPress.com plan? No. Plugin installation is only available on paid plans. If you don’t see the “Plugins” option in your dashboard, you’re likely still on the free plan.
Are all WordPress.com plugins safe to use? Not all of them. Stick to well-rated plugins with regular updates and active users. This reduces the risk of security issues or compatibility problems.
Do plugins slow down my website? They can — but only if you install too many or use poorly built ones. A few high-quality plugins won’t hurt your site. In fact, some (like performance plugins) can make it faster.
How many plugins should I install? There’s no fixed number, but the rule is simple: only install what you actually need. Start with the essentials, then add more as your site grows.
What should I do if a plugin breaks my site? Go to your Plugins page and deactivate the plugin. Your site should return to normal. This is also why having a backup plugin is important.
Can I delete a plugin after installing it? Yes. If you’re not using a plugin, it’s better to delete it. This keeps your site clean and reduces potential issues.